Here's a shot of one I made several years ago
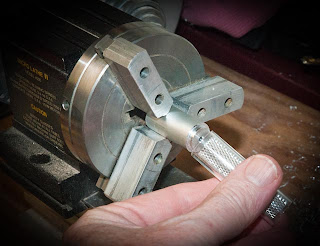
and here are some of the steps to make one: I left out the trivial ones like hack-sawing through 1/2 inch (12.5mm) aluminium bar and cutting the acrylic tubing. Clicking on any photo should enlarge it.
 |
| smooth ends |
 |
| centre drill hole for wires |
 |
| enlarge hole and drill through base |
 |
| test fit and turn some more |
 |
| clean up the exterior |
 |
| on my mill, mill channel for power cord so base will sit flat |
 |
| now just assemble the LED electronics and they're done. If you look REALLY closely you can see the groove in the base of the right hand light. |


Its amazing the amount of work that goes into making your miniatures... thank you for showing us Peter!
ReplyDeleteVery sleek.CM
ReplyDeleteLove the "behind the scenes" shots.
ReplyDeleteThanks for sharing your process. I would like to make some light fixtures for my latest project. A simple shop light and outside lamps. What kind of LEDs do you use? I'm thinking about the Evans Designs lights. I've used them before, but did not get the results I had hoped for. Any suggestions?
ReplyDeleteKathi,
ReplyDeleteI usually make up my LED components from individual parts. Often the LEDs come from Ngineering (I resell his products because I like them so much) and I wire the SMD (surface mount - no leads so you solder directly onto the LED) LED to a very small DC power source. That way I can have the actual light in one place and the power source hidden somewhere else.